- Which regions are participating in the pilot project?
- Creation and loading;
- Filling out the document;
- Checking and sending;
- Processing statuses;
- View scan results;
- How to print or delete a document? How to create a recalculation? How to view document flow history?
In the pilot regions, benefits are paid to employees not by the employer, but directly by the Social Insurance Fund (see Decrees of the Government of the Russian Federation dated April 21, 2011 No. 294 and dated December 1, 2018 No. 1459). The employer is only required to submit the relevant documents to the fund’s branch. The procedure for sending documents to the FSS is described in the video.
A pilot project for sending sick leave to the Social Insurance Fund is taking place in the following regions:
- 01 - Republic of Adygea;
- 03 - Republic of Buryatia;
- 04 - Altai Republic;
- 06 - Republic of Ingushetia;
- 07 - Kabardino-Balkarian Republic;
- 08 - Republic of Kalmykia;
- 09 - Karachay-Cherkess Republic;
- 10 - Republic of Karelia;
- 11 - Komi Republic;
- 12 - Republic of Mari El;
- 13 - Republic of Mordovia;
- 14 - Republic of Sakha (Yakutia);
- 15 - Republic of North Ossetia - Alania;
- 16 - Republic of Tatarstan;
- 17 - Republic of Tyva;
- 18 - Udmurt Republic;
- 19 - Republic of Khakassia;
- 20 - Chechen Republic;
- 21 - Chuvash Republic;
- 22 - Altai region;
- 25 - Primorsky Krai;
- 27 - Khabarovsk Territory;
- 28 - Amur region;
- 29 - Arkhangelsk region;
- 30 - Astrakhan region;
- 31 - Belgorod region;
- 32 - Bryansk region;
- 33 - Vladimir region;
- 35 - Vologda region;
- 36 - Voronezh region;
- 37 - Ivanovo region;
- 38 - Irkutsk region;
- 39 - Kaliningrad region;
- 40 - Kaluga region;
- 41 - Kamchatka region;
- 42 - Kemerovo region;
- 43 - Kirov region;
- 44 - Kostroma region;
- 45 - Kurgan region;
- 46 - Kursk region;
- 48 — Lipetsk region
- 49 - Magadan region;
- 51 - Murmansk region;
- 52 - Nizhny Novgorod region;
- 53 - Novgorod region;
- 54 - Novosibirsk region;
- 55 - Omsk region;
- 56 - Orenburg region;
- 57 - Oryol region;
- 58 - Penza region;
- 60 - Pskov region;
- 61 - Rostov region;
- 62 - Ryazan region;
- 63 - Samara region;
- 64 - Saratov region;
- 65 - Sakhalin region;
- 67 - Samara region;
- 68 - Tambov region;
- 69 - Tver region;
- 70 - Tomsk region;
- 71 - Tula region;
- 73 - Ulyanovsk region;
- 75 - Transbaikal region;
- 79 - Jewish Autonomous Region;
- 83 - Nenets Autonomous Okrug;
- 80 - Transbaikal region;
- 87 - Chukotka Autonomous Okrug;
- 89 - Yamalo-Nenets Autonomous Okrug;
- 91 - Crimea;
- 92 - Sevastopol;
- 95 - Chechen Republic.
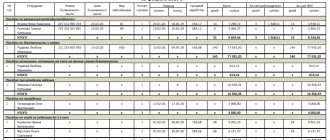
Registers of sick leave (disability certificates) are transferred by policyholders or insured persons to the Social Insurance Fund for the calculation of disability benefits to insured persons.
The following types of benefits are available in Kontur.Extern:
Insured events and conditions for payment of benefits are established by Federal Law No. 255-FZ dated December 29, 2006.
| Insurance case | Conditions for payment of benefits |
| Temporary disability | Paid in the following cases: - illness, injury; - caring for a sick family member; — quarantine of the insured person or child under 7 years of age; — after-care in sanatorium-resort institutions |
| Occupational diseases and injuries | Paid in case of loss of ability to work due to an accident at work or occupational disease (detailed conditions are described in Federal Law No. 125-FZ of July 24, 1998) |
| Pregnancy and childbirth | It is paid to the woman in total for the entire period of leave (in the absence of complications and the birth of one child, the period is 70 days before and after childbirth). Features of benefit payment are described in Chapter. 3, art. 10 255-ФЗ |
| Early pregnancy | Paid as a lump sum to women who registered with medical institutions in the early stages of pregnancy |
| birth of a child | One-time benefit for the birth of a child |
| Baby care | Monthly child care allowance until the child reaches the age of one and a half years |
| Burial | Social benefits for funerals are paid in accordance with Federal Law No. 8 of January 12, 1996 |
| Payment of 4 additional days off for one of the parents to care for disabled children | Four additional paid days off per month are provided to one of the working parents (guardian, trustee) to care for disabled children and people with disabilities from childhood to 18 years (Article 262 of the Labor Code of the Russian Federation) |
The procedure for generating and sending benefits
To start working with FSS benefits, on the main page of the system, select the desired organization at the top of the page and go to the “FSS” section > in the “Benefits and ELN” section, click on the “All documents” button.
If the item “FSS benefits and certificates of incapacity for work” is missing, make sure that the organization of one of the regions participating in the pilot project is indicated at the top of the page.
Who should take sick leave
Let us remind you that the following people are subject to a two-week coronavirus quarantine:
- citizens who arrived in Russia from countries where cases of new coronavirus infection have been registered;
- persons who live with the arrival.
Since March 20, temporary rules for issuing certificates of incapacity for work, assigning and paying hospital benefits for persons in quarantine due to coronavirus have been in effect. The rules were approved by Decree of the Government of the Russian Federation dated March 18, 2020 No. 29 (see “Quarantine during coronavirus: temporary rules have been introduced for processing sick leave and paying benefits”).
Quarantine sick leave issued remotely will be paid in full from the Social Insurance Fund:
- the first payment will be received after 7 calendar (5 working) days of being on sick leave,
- the second - after the end of the period of incapacity for work within one calendar day.
Creating documents in Kontur.Extern
You must click on the “Create a new document” button.
In the window that opens, select the type of benefit, mark the desired employee in the list and click “Create document”.
The list of employees in the “FSS Benefits” service is common with the service for preparing reports to the pension fund Kontur-Otchet PF.
If the required employee is not in the list, then click the “Add new employee” button.
In the window that appears, fill in your full name and SNILS and click “Add employee.” The added employee will appear in the list and will be selected by default, and will also appear in the PF Contour-Report service.
Next, you should start filling out the form in the window that opens.
Uploading a finished file into the system
Click the “Load from file” button.
In the window that opens, select a file and click “Open”. The file accepted into the system must be generated in the format established by the FSS and have an xml extension.
The uploaded documents will appear in the list. To check a document and send it to the FSS, click on the line with the required document. A form for editing and submitting will open.
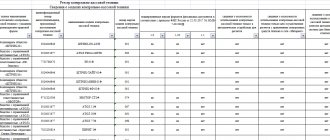
Sick leave register form
At the level of legislation or regulations, the register of sick leave (RBL) is not unified. In 2008, the FSS proposed a form in Excel, but did not advertise it particularly and did not require a uniform appearance. Since 2011, the Foundation has been implementing a pilot project, for which it has developed an xml file structure. However, it does not include formatting. The main thing is to transfer to the FSS data that is accessible for machine processing. In the pilot project, a paper form is acceptable only for organizations with up to 25 employees. Others must submit information electronically.
The FSS offered its sample design for the RBL as part of a free program for its creation. However, the Fund does not limit employers in choosing software: you still need to download the electronic register separately. There is no built-in function in the software from the FSS. Accounting programs provide greater opportunities, but direct transfer of the register is not implemented there either. Alternatively, you can create a RBL on your own if you have an IT department in the organization: xml encoding is not so complicated.
Filling out the document
There are three sections that must be completed in the benefit payment document. Depending on the selected type of manual, the following sections will be displayed:
- "General information".
- "Certificate of incapacity for work" . The section is displayed in disability benefits, maternity benefits, occupational injury benefits, and illness benefits.
- "Calculation of benefits."
- "Additional documents". The section is displayed in the maternity benefit (if the “Registered in the early stages of pregnancy (up to 12 weeks)” checkbox is checked in the disability benefit), early pregnancy benefit, childbirth benefit and child care benefit.
All required fields will be highlighted in red.
Who needs a registry and why?
Since 2011, the “Direct Payments” project has been operating in the Russian Federation, within the framework of which employers do not independently pay for sick leaves to employees, but send information for calculating benefits to the Social Insurance Fund, and the government agency is now responsible for transferring funds. Organizations and individual entrepreneurs collect the necessary data in special tables and then transfer them to the Social Insurance Fund.
Based on Decree of the Government of the Russian Federation No. 294 of April 21, 2011, registers in the Social Insurance Fund for sick leave are prepared so that employees receive the following types of benefits:
- for illness and injury, with the exception of cases when a certificate of incapacity for work is opened due to an industrial accident or occupational disease;
- for pregnancy and childbirth;
- when registering in the early stages of pregnancy;
- at the birth of a child;
- for caring for a newborn.
In addition, the developed structure of the registry in the Social Insurance Fund is convenient for transferring data necessary for reimbursement of expenses for funeral benefits and payment of additional days off to persons caring for disabled children.
IMPORTANT!
Starting from 2021, the project for direct payment of benefits from the Social Insurance Fund will be extended to all regions, and all organizations will have to work taking into account the new requirements.
Section "General information"
In this section, information about the employee, the employing organization and the method of payment of benefits is filled out. The completed data is saved within the employee; when creating a new sheet, this section will be filled in automatically.
1. «Applicant” - it should be noted who is the recipient of the benefit:
- “Benefit recipient” - the benefit is received by the applicant himself.
- “Authorized representative” - the benefit is received by the applicant’s representative.
When you select the latter, a block opens in which you should enter information about the authorized representative - full name and passport details.
2. “Information about the benefit recipient” - you must fill in the details of the benefit recipient, such as full name, SNILS, date of birth, address, gender, registration status and identification document.
Information about employees is available simultaneously both in the “FSS Benefits” service and in the PF Contour-Report. If you change information about an employee in one service, it will change or be deleted in the other.
3. “Information about the employer (organization)” This section is filled in automatically from the payer’s details. All lines except the TIN can be changed manually. If you change the details of the employing organization here, they will also change in the details.
4. “Benefit payment method” - you must choose one of two payment methods:
- Transfer through a bank;
- To the “WORLD” card;
- Postal transfer;
- Through another organization.
5. The “General Information” section is completed, you need to move on to the next section. The “Save changes to the document?” window will appear, click the “Save” button and proceed to filling out the next section.
Section “Certificate of incapacity for work”
The section is present in the following types of benefits:
- disability benefits;
- maternity benefits;
- benefits for occupational injury, illness.
Filled out based on the certificate of incapacity for work submitted by the employee. The layout of the fields corresponds to the paper form that is issued at the medical institution.
1. “Incapacity sheet No.” - the number of the incapacity sheet should be indicated in the cell: a 12-digit code under the barcode in the upper right corner of the incapacity sheet form.
2. Indicate whether the sheet is primary or continuation; duplicate or original.
- If the disability sheet being generated is not a continuation of another sheet, check the “Primary” box.
- If a certificate of incapacity for work is issued to replace a lost one, Fr.
- If the sheet is a continuation of another sheet, the number of the primary sheet should be indicated in the “Continuation of disability sheet No.” field. There is no need to check the “Primary” box.
3. Fill out all the required fields below (they will be highlighted in red), just like on a paper form issued by a medical facility.
Some filling features:
- Depending on which reason for disability code is selected, the required fields will be highlighted in red frames below.
- The code book does not contain the values 04 (work accident or its consequences) and 07 (occupational disease or its exacerbation). A document containing these reasons for disability cannot be sent electronically. These data should be submitted to the Social Insurance Fund on paper.
- If you have chosen a part-time job, then in the “No.” field you should indicate the number of the certificate of incapacity for work presented at the main place of work.
- If another sheet was issued, which is a continuation of the one being filled out, then its number should be indicated at the very bottom of the section.
4. The “Sheet of Incapacity for Work” section is completed, click the “Save” button and move on to the next one.
Where and how can an employer find and view the ELN?
On the FSS website
From July 1, 2021, both types of sick leave are valid: electronic and paper . But the employee will be able to use the first one only if the employer has a personal account in the social insurance fund system, and the entrepreneur will be able to see the personal identification number of his subordinates only there. To see an employee’s personal identification number, the employer needs:
- Log in to the policyholder’s personal account (since he pays insurance premiums for his subordinates, then for them he is the policyholder).
- Open “Electronic certificates of incapacity for work.”
- In the fields that appear, enter the number of the employee’s certificate of incapacity for work (LS) and SNILS, then click “Get LS”.
The sick leave will appear in the accounting register; in the “To be filled out by the employer” tab, you can enter the necessary data, as in a paper bulletin, save them, and the information will immediately go to the Social Insurance Fund. The document is marked “Filled out by the employer.” We talked about the status of the electronic sick leave here.
Attention : You can use ELN only if the medical institution where the workers are treated is connected to the Social Insurance Fund system and has the ability to transfer data to the fund.
On the website of the Unified Identification and Authentication System (USIA)
- Open a personal account for the policyholder (you can create it through the State Services website). Read more about the procedure for creating a personal account through State Services here.
- The policyholder requests information, indicating the SNILS number of his employee and the number of the electronic certificate of incapacity for work provided by him.
- Just as in the previous case, the fields marked “To be filled out by the employer/insurer” are filled in and saved.
On the UIIS “Sotsstrakh” portal
- In your personal account, as in previous cases, use the employee’s SNILS number and LN number to request a certificate of incapacity for work.
- Fill in the required fields and save, sending the data to the system.
The procedure for registration and transfer of electronic sick leave data was approved by Government Decree No. 1567 of December 16, 2017 and Order of the Ministry of Health and Social Development No. 624n of June 29, 2011 on the procedure for issuing sick leave.
To fully function in the ENL system, the organization must have a strengthened electronic signature compatible with the Social Insurance Unified Information System.
Section "Calculation of benefits"
In this section, fill in the data necessary to assign benefits to an employee by the regional branch of the Social Insurance Fund. All required fields will be highlighted in red.
1. “Information attribute” - you should select the “Primary information” item if the benefit is sent to the Social Insurance Fund for the first time. The “Recalculation” item is selected if the benefit has been sent and adjustments need to be made.
2. “Date of submission of documents to the policyholder” - the date when the benefit recipient submitted the application and additional documents to the employer should be indicated.
3. Indicate the regional coefficient, rate, insurance period, year and amount of earnings.
If you need to specify information about replacing billing years, you should check the “Fill in information about replacing years” checkbox. Additional fields will appear to indicate the years to be replaced.
4. “Benefit payment period” - you should select whether the benefit is paid entirely at the expense of the employer or whether there is a period for which the benefit is paid at the expense of the Social Insurance Fund. In the second case, in the field “Benefit at the expense of the Social Insurance Fund for the period”, be sure to indicate the beginning and end of the period for which the benefit is accrued at the expense of the Social Insurance Fund.
5. The “Benefit Calculation” section is completed; click the “Check and Submit” button.
Regulatory regulation
With direct payments, the procedure for processing and paying benefits differs from the procedure used under the credit system.
More details Direct payments of benefits from the Social Insurance Fund
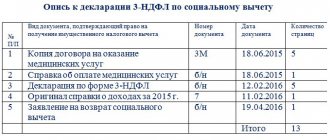
To receive benefits for temporary disability, the employee brings documents to work (clause 2 of the Regulations, approved by Decree of the Government of the Russian Federation of April 21, 2011 N 294):
- certificate of incapacity for work: in paper form ;
- if an electronic sick leave has been issued, then report its number;
For sick leave in case of an industrial injury or occupational disease, the organization provides all documents to the Social Insurance Fund in paper form , additionally attaching (in case of injury):
- report on an industrial accident (form N-1) or copies of the investigation materials (clause 3 of the Regulations, approved by Decree of the Government of the Russian Federation of April 21, 2011 N 294).
The employer calculates the benefit for the first 3 days of temporary disability (clause 6 of the Regulations, approved by Decree of the Government of the Russian Federation of April 21, 2011 N 294) and pays it on the next day after the calculation, established in the organization for the payment of wages (part 1 of article 15 Law N 255-FZ).
Sick leave for caring for a sick family member is paid for at the expense of the Federal Social Insurance Fund of the Russian Federation in full (Part 3, Article 3 of Law No. 255-FZ).
Section "Additional Documents"
The section is present in the following types of benefits:
- maternity benefit (if the disability benefit checkbox “Registered in the early stages of pregnancy (up to 12 weeks)”);
- early pregnancy benefits;
- childbirth benefit;
- child care allowance.
Some filling features:
- It is mandatory to fill in the data from the child’s birth document - type of document, series and number, date of issue, full name, date of birth.
- If necessary, you can fill in information about a certificate from the other parent about non-receipt of benefits, information about an adoption or guardianship document, and information about an agreement on transfer to a foster family.
After filling out the section, click the “Save” button.
Send calculation
- In the “Benefit amount” block, fill in the amounts and check the number of calendar days for calculating the benefit. The default is 730 days. You can change this number, for example for maternity leave, or if the year for calculation is a leap year.
- Click "Submit Calculation".
If the employee provided:
- ELN number and “the region is not participating in the pilot project” - VLSI will send the calculation using ELN;
paper sick leave and “the region is participating in a pilot project” - ;
- ELN and “the region is participating in the pilot project” - calculation according to ELN and.
If you do not want the information registry to be sent along with sick pay, disable your organization's participation in the pilot project.
Also, the registry will not be sent automatically if:
- a subordination code is indicated that does not belong to the region participating in the FSS pilot project “Direct Payments”;
- a negative protocol was received for calculating the ELN;
- the primary LN indicates a period of incapacity for work of less than 3 days and does not indicate the period for payment of benefits at the expense of the Social Insurance Fund;
- in the “Other” field the disabled status is set to “died”;
- the cause of disability is indicated “04 - industrial accident” or “07 - prof. disease".
Checking and sending
1. To send, you must first open the document, then click the “Check and Send” button.
If you need to send several documents at the same time, you should open the “Details and Settings” menu and click the “Enable bulk sending mode” button.
After this, you will be able to send several documents.
2. The scan will begin.
- If the verification is successful, you should select a certificate to sign the document and click “Send document to the FSS.”
The list will display only qualified certificates whose TIN matches the organization’s TIN from the document.
The registration number of the policyholder in the certificate must match the registration number of the organization indicated in the document.
If the document is sent for a separate unit (in this case, the subordination code ends with 2), then the registration number of the policyholder in the certificate must match the additional FSS code specified in the document.
After sending, the document will appear first in the list with the status “Queue for sending”.
- If errors are found during the check, you should click the “Close and proceed to correct errors” button. Fields with errors will be highlighted in red; you should correct them and resend.
Request sick leave
- Generate a “Sick Leave” document in one of the following ways:
- in the “Reporting” or “Accounting/Reporting” section (depending on the configuration), click “Create”, select “Benefits and sick leave”, and then the “Sick leave” form; Which configuration should I choose?
- in the “Reporting/Benefits and Sick Leave” or “Accounting/Reporting/Benefits and Sick Leave” section (depending on the configuration), click “Create” and select “Sick Leave”.
- Indicate the employee for whom the sick leave is issued and check the details.
- In the line “Certificate of incapacity for work”, fill in the ELN number and the date of provision. If the sick leave is generated according to the Social Insurance Fund, the number will be filled in automatically. Click “Request to FSS”.
Within a few minutes, the FSS will send an electronic certificate of incapacity for work - the entry in the “Reporting/Benefits and Sick Leave” section will have the status , and in the document itself “ Sick leave received
».
If you are subscribed to receive sick leave from the Social Insurance Fund, the document will be generated automatically and will be marked with the icon. Open it in the “Reporting/Benefits and Sick Leave” section.
If you calculate your salary in VLSI, you can also create sick leave in the “Employees/Salary/Sick Leave and Benefits” section.
Processing statuses
- “Created” - the document was created, but not sent to the FSS. The date and time the document was last modified is indicated.
- “Queued for sending” - the document is queued for sending to the Social Insurance Fund.
- “Submit Error”—errors occurred during the document sending process. You need to send the document to the FSS again. To do this, click on the line with the document and click “Send again”.
- “Not accepted by the FSS” - as a result of checking the document in the FSS, errors were identified. You should correct the errors indicated in the FSS protocol and resend the document.
- “Accepted by the FSS” - the document is sent for consideration to the regional office of the FSS. The receipt can be viewed and printed.
If errors are found during the check at the regional office of the FSS, the notification should be received by Russian Post. In this case, you should make the required changes to the document and send it to the FSS.
View scan results
If the document is accepted for consideration
If the document was submitted for consideration to the regional office of the FSS, the status “Accepted by the FSS” will be displayed. This is the final status.
To view a receipt, you need to click on the line with the document and follow the “View receipt” link.
A window with a receipt will appear on the screen.
The document for which the receipt was received can be edited and sent again to the FSS. To do this, click on the line with the document and click the “Correct errors and resend” or “Create recalculation” button. These functions will also be available if you hover your mouse over the line with the document and click on .
- “Correct errors and send again” - this item should be used if the document passed checks at the FSS gateway and was submitted for consideration to the regional office of the FSS, but during its review, shortcomings were discovered and the FSS sent a notice of errors to the employer (for example, by Russian Post "). You should correct the errors indicated in the notice and resend the document.
- “Create recalculation” - this item should be used if the document passed checks at the FSS gateway and was submitted for review to the regional FSS office, but after receiving the receipt the employer realized that an error was made in the calculation data. When creating a recalculation in the “Benefit Calculation” section, you will need to indicate the reason for the recalculation, correct the necessary data and resend the document.
If the document is not accepted
If the document was not accepted by the FSS, the status “Not accepted by the FSS” will be displayed. To view the log, you need to click on the line with the document and follow the “View error log” link.
A window with the protocol will appear on the screen.
The document for which the protocol was received must be corrected and sent again to the FSS. To do this, click on the line with the document and click the “Correct errors and resend” button. This function will also be available if you hover your mouse over the line with the document and click on .
After selecting “Correct errors and resend”, the document status will change to “Created”. If necessary, you can always view the protocol by clicking on and selecting “ View document flow”.